DIY doggie door through brick wall (exterior section install)
- Sidney Jones
- Aug 19, 2019
- 4 min read
Updated: May 16
Hey again! This DIY has been something I had been thinking about for a while, but was a little intimidated by well the big hole I was going to have to cut in the wall. Well it's finally finished and is an awesome addition to the house! It is unconventionally, yet conveniently located in the dog room and let's the pups out to a little private dog run I made for the little ones!
** Disclaimer: I am not a professional and urge you to check with a professional before attempting to make structural changes to your home. I am not liable for any damages that occur in attempting to install a doggie door such as this. Please complete this project at your own risk.**
Materials Used:
1. PetSafe Wall Entry Pet Door with Telescoping Tunnel - Amazon ($94.95)
2. Flex Tape Flex Seal, Flex Shot, Flex Liquid 4-in x 5-ft Black Heavy Duty Duct Tape - Lowes ($12.98)
3. DAP Alex Plus 10.1-oz White Paintable Latex Caulk - Lowes ($2.58)
Safety First:
1. Safety Glasses With Clear Lenses - Harbor Freight ($1.99)
2. Dust And Particle Mask 5 Pk. - Harbor Freight ($1.49)
3. Reusable Corded Ear Plugs - Harbor Freight ($1.99)
4. Work gloves
5. Pants/Long sleeve shirt
Tools Used: (quick video of the entire process below)
1. Pencil
2. Drill
3. Masonry Drill Bit Set 5 Pc - Harbor Freight ($5.99)
4. 6 In. Double Edged Wallboard Saw - Harbor Freight ($4.49)
5. 4-1/2 In. 4.3 Amp Angle Grinder - Harbor Freight ($14.99) **if I had to do it over again I would have probably bought a grinder with a larger wheel capacity**
6. 4-1/2 In. Metal/Masonry Grinding/Cut-Off Wheel Assorted Set 10 Pc - Harbor Freight ($11.99) *masonry wheels can likely be purchased individually, but I got the variety pack for future use*
7. Chisel
8. Hammer
I won't waste your time going through all of the beginning steps in the process as the instructions are fairly simple to follow and can be applied to brick as well. My method for cutting through brick was probably more time consuming than it had to be, but it got the job done. Better methods can be found online. However, where this project got tricky was in installing the actual doggie door in through the brick after the hole was cut because it doesn't seem to be meant for brick exteriors. Therefore, I will start the steps from after both inside and outside holes have been made.
Step 1:
Once I made the interior wall and exterior brick hole, I checked to make sure my doggie door fit on both sides. I had to improvise a little bit because my wall was wider than the telescoping piece. I addressed this by adding supports within the wall as described below.

After, I added supports to the bottom and sides to ensure the plastic telescoping would not break under the pressure of the dogs walking through. I chose to use a 2"x6" piece of wood for three of the four sides and left the top without a piece (we will address this later).
Because my doggie door was higher above the ground I had to add a ledge for the support piece to lay on. I did this by using (2) 1"x4"s cut to the height needed to make the support flush with the bottom of the wall, just enough for the plastic telescoping to sit on and I then screwed them into the studs on both sides.
I then put the bottom support on the makeshift ledge and side supports in and screwed them into place. This allowed most of the gap to be covered by wood and only left the top open once the doggie door was put in.


Step 2:
I followed the instructions exactly for installing the interior side of the doggie door then proceed to install the exterior. What I found was that because of the brick and the positioning of the holes, the toggle screws included in the kit were not wanting to work.
Here is where improvising again came into play. I attached a couple small pieces of wood to each side of the supports inside the wall and went ahead and inserted the exterior side of the doggie door. I then screwed my screws directly through the telescoping plastic into the extra wood I added to the supports (I did 2 screws to each side ONLY on the plastic telescoping of the exterior doggie door as the interior was already held in place by toggle screws).
After having secured both sides of the doggie door adequately there was still the issue of extra space on the bottom, sides, and top of where the plastic telescoping did not quite meet. This is where I used my Flex Tape to completely cover the interior of the doggie door. I was sure not to obstruct the path of the flaps so it could still get a good seal. This flex tape allowed for the gaps to be covered and to seal the plastic telescoping gap easily, as well as covered the screws I put into the plastic! Plus it should be a water tight seal and easy to wipe down.
Step 3:
The last thing I did in completing the exterior portion and finishing up this doggie door installation was caulk the exterior part of the doggie door. I used DAP Alex Plus 10.1-oz White Paintable Latex Caulk to seal where the doggie door met the brick. I also sealed the 4 little holes on the exterior that the toggle screws were meant to go in. This ensured a water tight seal to keep water from ever leaking into the wall.


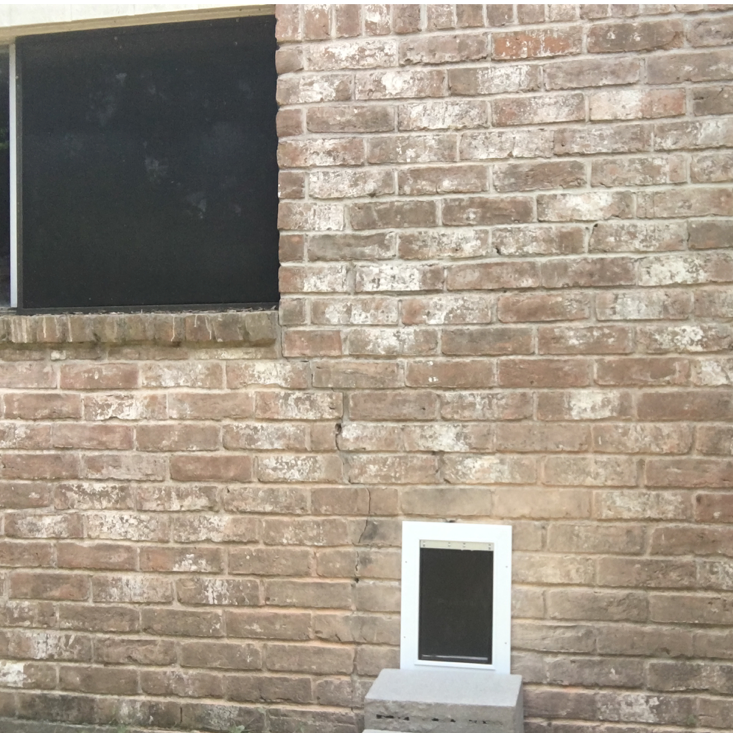
That finished the doggie door installation through the brick! Thank you for reading!

Comments